On Pistol Fundamentals

Home > On Pistol Fundamentals

Introduction

Hey, all! Doryan–Devil 6-1–over at Range Rival here! I’ve got a short article regarding some important fundamentals of pistol shooting. To get good, these should be revisited, analyzed, and practiced routinely. These simple fundamentals are: Stance, Grip, Sight Alignment, and Trigger Pull. All of these play a role in accuracy and recoil management. I fondly recall my early pistol shooting days, when I couldn’t hit the broad side of a barn, until I learned what trigger preparation was. The experience was highly illuminating, and the gain in skill was immediate. I hope to provide the same experience for newer shooters here. Let’s get to it!

Stance

Believe it or not, posturing does play a role in shooting accurately, albeit a much lesser role than the following fundamentals and less so in more advanced shooting that requires odd posturing–e.g. when having to deal with obstacles. A lot of newer shooters tend to be scared of the gun, and as a result usually stand leaned back, with their head somewhat tilted away from the weapon and arms nearly locked, as if to have the weapon as far away from themselves as possible to protect themselves from it. Don’t do that. A good stationary shooting stance leverages the bodily systems to stabilize the gun and manage recoil. The way I usually teach a new shooter stance begins without the weapon in hand. Begin by acquiring a solid fist fighting stance: Legs about shoulder width apart with the back foot slightly angled out, upper body leaned forward a bit, and head straight. This is shown below both with and without the gun. A common adage you’ll hear is “nose over toe” when considering how much forward lean should be applied. Always forward and never back. Once a good stance is acquired, you’re ready to grab your platform and move on to the first of the most important fundamentals: Grip.


Grip

This is where the magic begins. Firing a pistol is a delicate balance of physics and forces, with the ultimate goal of efficiently managing recoil. This means getting the gun back on target as quickly as possible, with minimal effort. 

In terms of that physics, you can think of your wrists, elbow joints, and shoulder joints as types of springs. These springs connect rigid rods that are your hands, forearm, upper arm, and upper body. When firing, almost all of the recoil is from the gas exiting the barrel, and the slide traveling rearward. As Newton simply put in his 3rd Law of Motion: Every action is met with an equal and opposite reaction. The opposite reaction to the act of firing is recoil. So how do we deal with that? The second line of defense is your posturing. The first line of defense is your grip. So what should that look like?

Common Grip Issues 

There’s a ton of types of grips out there. Some people teacup the magazine. Some grab their wrist. Others try to brace the back of their dominant hand with their support hand thumb, which is terrible and more often than not, will result in getting that thumb bit by the slide. Ask me how I know. At this point in the art of shooting, there is one widely accepted and proven grip. It goes by many different names, but here, we’ll call it the Thumbs Forward grip. It takes advantage of the idea that you’re going to point the gun where you’re pointing. This method also allows high grip pressure without sympathetic forces applied to the gun. 

Why We Use the Thumbs Forward Grip 

The Thumbs Forward grip is quite simple, but may feel awkward at first. It may require practice to build familiarity.

Setting it goes as follows: With your main hand, grip the gun as high as you can into the tang, thumb pointed forward. This will help keep your hand as close as possible to the vertical part of the center of mass of the gun. The remaining fingers wrap tightly around the grip, squeezing hard but not to the point of shaking. Next, take the support hand and roll it forward like you would give a handshake, but roll it a bit further down. Now, with that angle, grip the weapon with your offhand–main hand still holding–and wrap the fingers of your support hand around the fingers of your main hand, while placing the support hand thumb under the main hand thumb pointed forward, making sure there is no gap between your hands. If done correctly, the base of your thumb at the top of the hand is married to the inside of the first thumb knuckle–counting from the palm up-of your main hand thumb, as shown in the gif below. Again, it may feel weird at first, but this is a tried and true grip, from competitive shooters to special forces. 

Once in full grip and there’s no space, it’s a matter of squeezing with your main hand and pulling with your support hand. These will naturally balance each other out. Again, grip not quite to the point of shaking, but very firm. As an aside, that old “70/30 pressure rule” is physically impossible to do via Newton’s 3rd Law, so don’t worry about that. The arms should then be extended, but not locked. I find my muzzle around 3-6 inches back from my arms being completely locked.

How The Thumbs Forward Grip Works

I’ll keep the physics of this situation brief. With this grip, upon trigger pull, the high main hand grip on the tang near the center of mass of the weapon helps prevent excessive torque forces upwards. The main hand also pushes most of the recoil back, monumentally reducing muzzle flip. The squeezing and push-pull forces reduce the overall felt impulse, since our joints act as springs. The thumbs pointed forward will return your weapon roughly back to where you’re pointing before the shot broke. All of these together will result in substantial recoil management. I chose the word management carefully, because we do not stop recoil or mitigate it. Rather, we manage it in a controlled way. A prime example: fire two rapid shots with the Teacup Grip, then do the same with the Thumbs Forward grip. You’ll quickly feel the difference in muzzle flip and target reacquisition.

Once you feel you understand the grip, next up is how to properly align sights.

Sight Alignment

There are two primary ways to aim your gun, and I’ll cover both! 

Red Dot Sights 

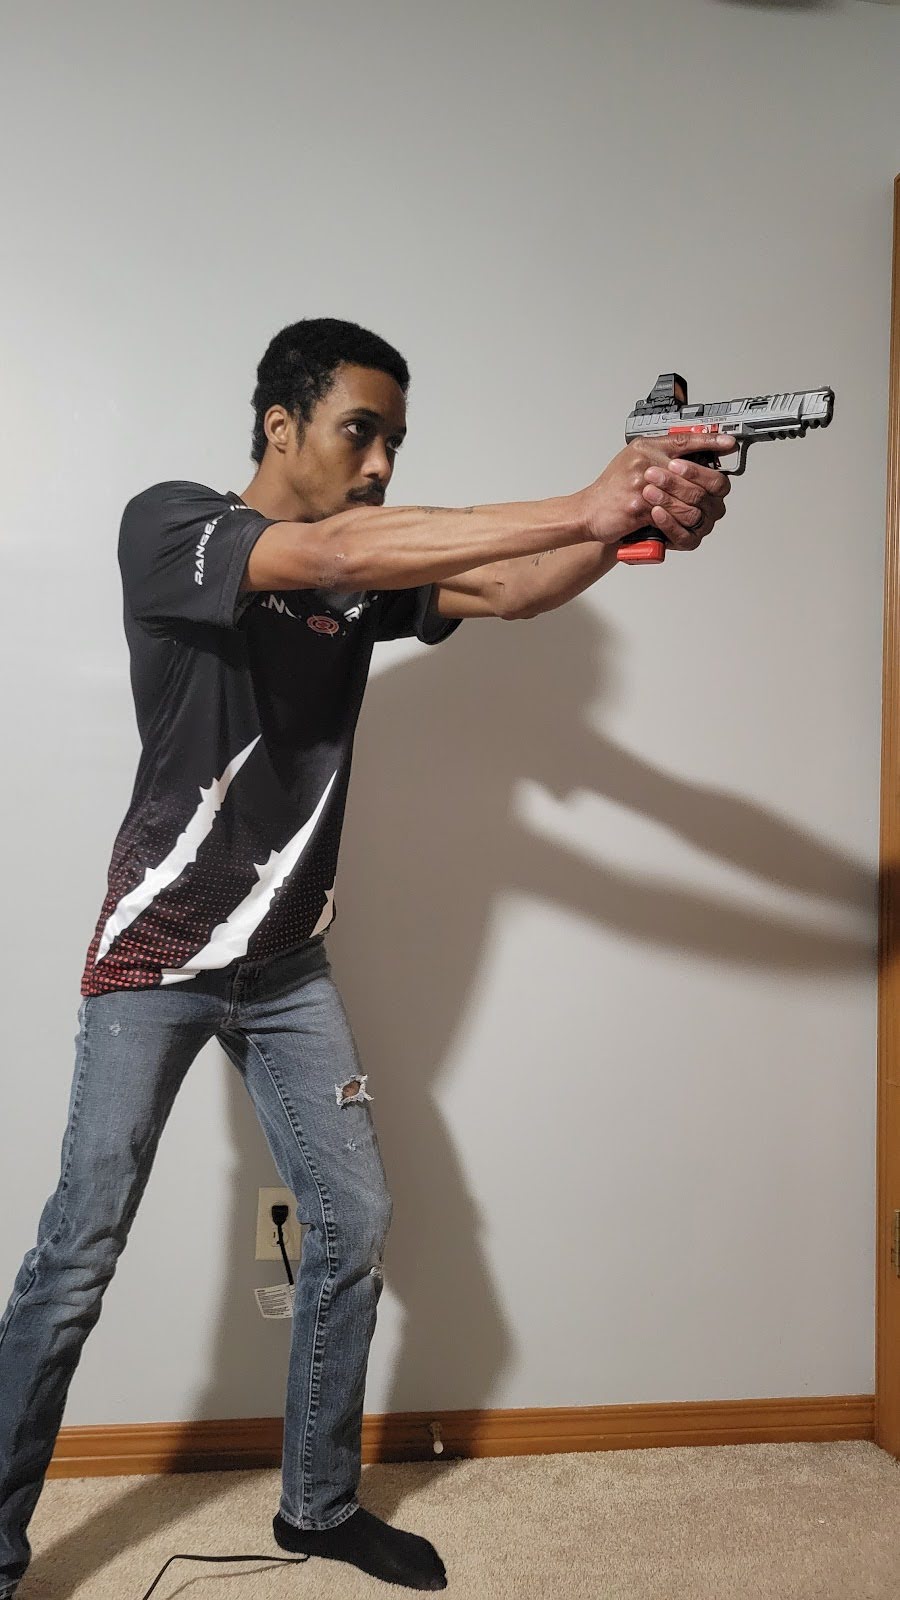
In the modern age of parallax free optics, this is relatively self explanatory with a red dot sight: put the dot where you want to hit, and shoot. Keep both eyes open for peripheral response and target-focused shooting.

Iron Sights

The real magic and mettle comes with iron sights. Iron sights are made in many varieties, but the biggest element are holds. The key difference between each hold is the aimed elevation. Common holds are: Combat Hold, Standard/Center Hold, and 6 o’clock Hold. The common factor between all of these holds is that when preparing to break that trigger, your front sight should be in focus, and not the target, both eyes still open. This is extremely important to note. Let’s get into the differences between the holds. 

Iron Sight Holds

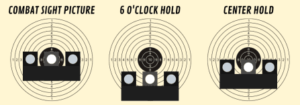
The Combat Hold simply requires that your desired point of impact should be left-right centered on the target, and the dot on your front sight be over where you want to hit, as pictured. Center hold is the same, save for placing the upper edge of the front sight on the desired point of impact. The 6 o’clock hold is a bit more complex in that it requires you to hold at the “bottom” of your desired point of impact, which can be extremely subjective based on target size. At the end of the day, if you’re running iron sights and your weapon manual does not specify the type of hold required, experimentation will need to be done to determine the type of hold you need. 

As a competition and defensive shooter, I recommend using a B8 style target at 25 yards to determine what type of hold your platform uses, if needed. My first pistol was the Beretta 92FS, and as a military sidearm, it utilizes the Combat Hold: hit where you aim. Most sights are adjustable in left-right alignment but not so in elevation (without filing on them), so again, this will require honest experimentation if you’re using iron sights. Once you have that settled, we come to the last, (and my favorite) pistol shooting fundamental: the art of the trigger pull.

Trigger Pull

For me this is where the magic happened. I couldn’t hit the broadside of a barn, until I understood that you shouldn’t necessarily just pull the trigger straight back right through the wall to be accurate. This brings us to the first mechanic of pulling a trigger: the Wall. With your weapon unloaded and no magazine, rack it back. Slowly pull the trigger until you feel resistance: that resistance is what we call the wall. Your trigger pull weight is specified relative to this point: how much more force it takes to drop your striker or hammer from the wall. 

In contrast to close range shooting where you pull straight through the trigger the moment you feel your weapon is pointed at target, trigger preparation significantly aids in accuracy, and is make-or-break as target distance increases. Trigger preparation consists of consciously pulling the trigger up to the wall as you’re aligning your sights, holding that trigger finger there until you’re ready, then pulling through the last bit. At the wall, the distance to pull (thus the overall length and time you apply forces to the weapon which can offset your point of aim during firing) becomes minimal. Proper technique can be shown in the gif below, where the first motion is to pull through the slack, and the second is to break the shot. 

Notice how the muzzle doesn’t jerk during the break. This is typically the most impactful instruction I see almost immediately improve a newer shooter’s accuracy. As you practice this, it becomes automatic, especially at distance or when high accuracy is required. Practice it often!

Summary

To piece this all together, the integrated act of shooting entails:

  • Acquiring a Stable Stance 
    • Fighting stance
    • Nose over toe
  • Use a Proper Grip
    • Thumbs Forward Grip
  • Good Sight Alignment
    • Keep both eyes open
    • Use a target focus when using a red dot
    • Know your hold for iron sights
  • Good Trigger Press
    • Trigger Preparation
    • Smooth break

Master all of these, and you’re well on your way to becoming a proficient shooter. Thanks for reading!

Devil 6-1

AUTHOR'S NOTES | April 1st 2025

The very first time I fired a firearm, it was a S&W M&P Shield in .40 cal, and I was unfortunate enough to have my support hand over my primary hand. As soon as I pulled that trigger, I made a wound that made a scar I still have today. Nevertheless, I fell in love. After I bandaged up and was instructed on how to hold the platform and a few more rounds, I decided that this is something I want to get good at. This is fun. From there, I purchased my first rifle and pistol and got to training.

Through works like this, I hope to help people avoid the pitfalls and dead ends–and slide bite–that I experience on my journey, and overall, learn from said experiences.

I’m super excited to be a part of this community and look forward to utilizing the platform to promote safe and effective firearms usage, as well as share my journey through the competitive and defensive shooting worlds!

-Devil 6-1

Leave A Comment!

2 Responses

    1. Great to hear! We just got our blog up this last month, many great intro articles to start with and then we will branch off into more intricate things! We do have a news related piece going up about the safety of the P320 models (lots of information already available but we compiled it further).

Leave a Reply

Your email address will not be published. Required fields are marked *